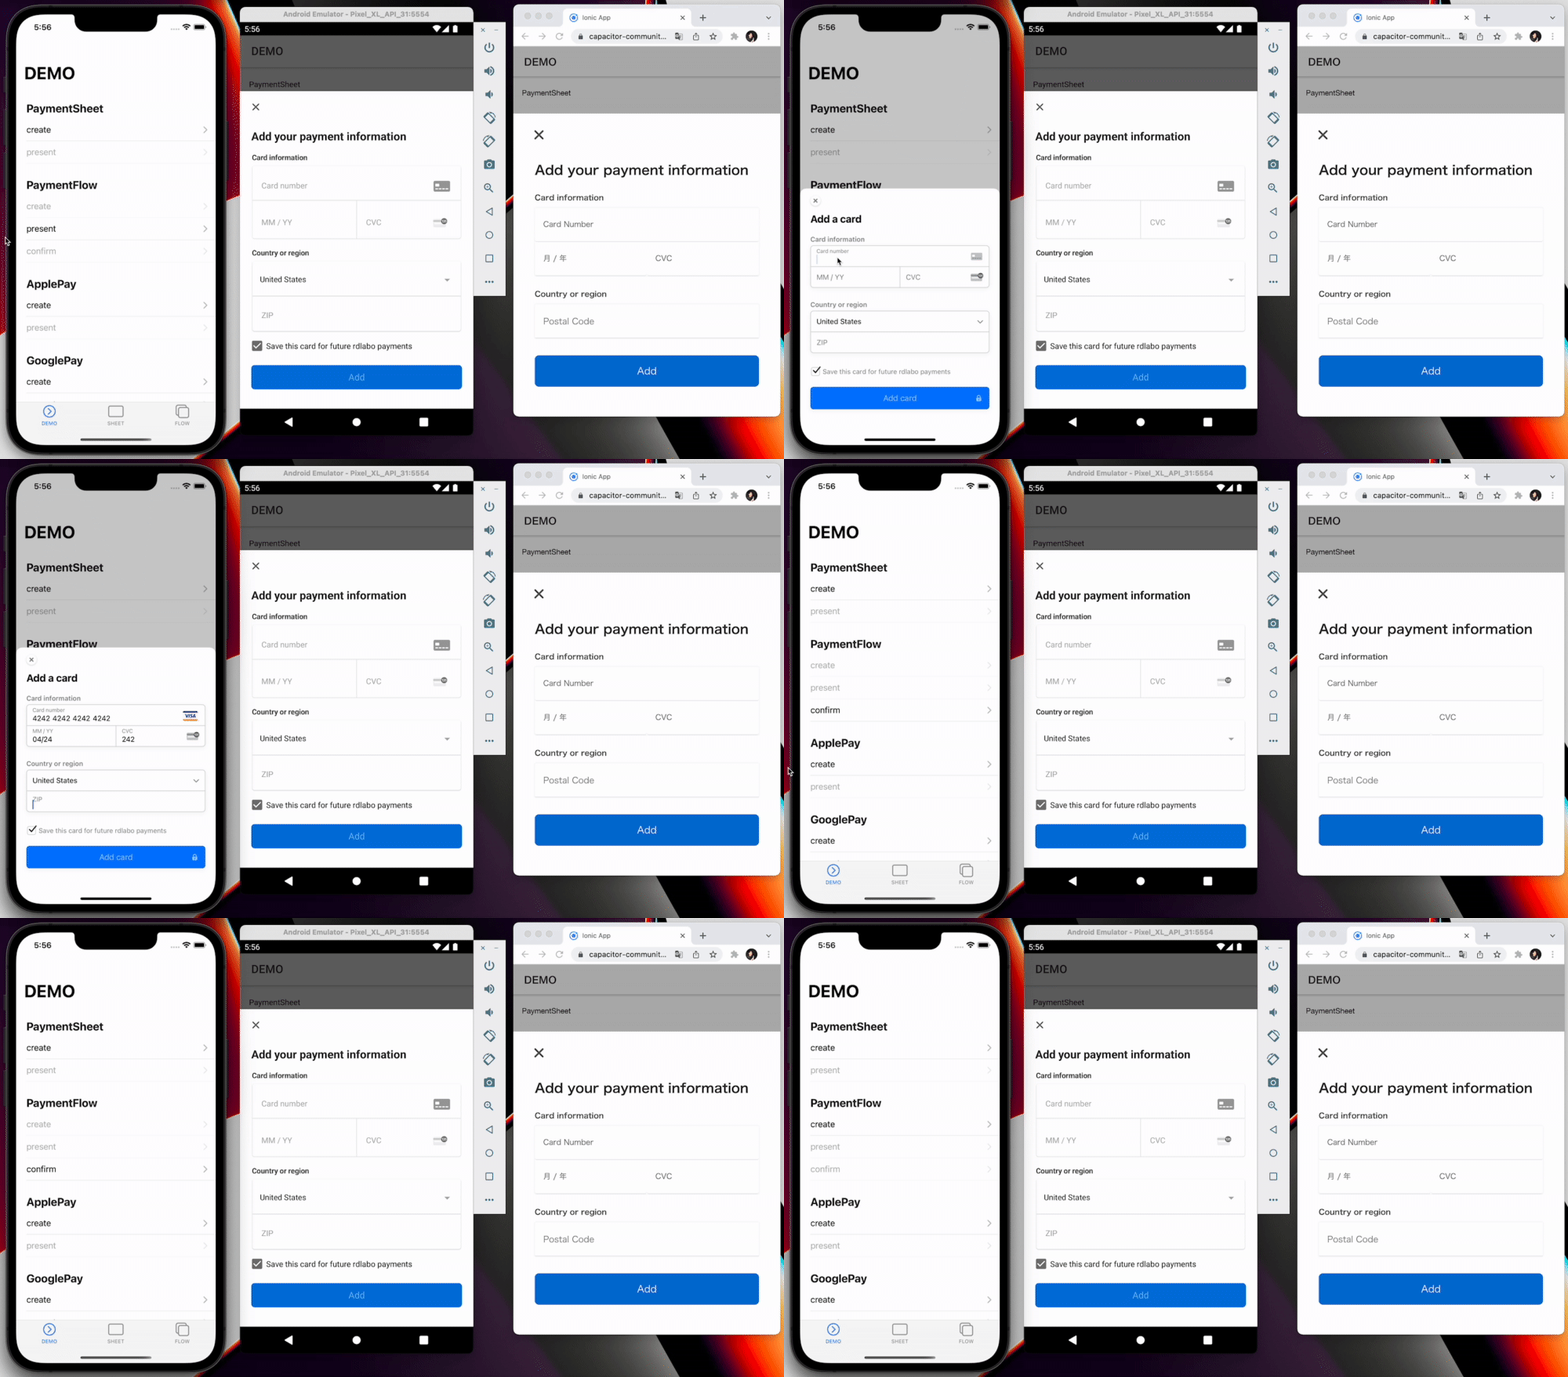
With PaymentFlow, you can make payments in two steps flow. When the user presses the submit button, the system only gets the card information, and puts it in a pending state. After that, when the program executes the confirmation method, the payment is executed. In most cases, it is used in a flow that is interrupted by a final confirmation screen.

This method can be used for both immediate payment with
PaymentIntent, and future payments with
SetupIntent.
Don't know what these Intent is? Learn it first at the official Stripe website.
PaymentIntent:
https://stripe.com/docs/payments/payment-intentshttps://stripe.com/docs/payments/payment-intents
SetupIntent:
https://stripe.com/docs/payments/save-and-reuse?platform=webhttps://stripe.com/docs/payments/save-and-reuse?platform=web
🐾 Implements Guide
1. createPaymentFlow
This method is settings for PaymentFlow. Before use, you should connect to your backend endpoint, and get every key. This is "not" function at this Plugin. So you will use
HTTPClient ,
Axios , Ajax , and so on. Here is example of Angular HttpClient. This method will get
paymentIntent,
ephemeralKey, and ephemeralKey.
Stripe provide how to implement backend:
https://stripe.com/docs/payments/accept-a-payment?platform=ios#add-server-endpointhttps://stripe.com/docs/payments/accept-a-payment?platform=ios#add-server-endpoint
After that, you set these key to createPaymentFlow method. You will need to prepare either paymentIntentClientSecret or setupIntentClientSecret and set it in the method.
import { Stripe, PaymentFlowEventsEnum } from '@capacitor-community/stripe';
(async () => {
const {paymentIntent, ephemeralKey, customer} = await this.http.post<{
paymentIntent: string;
ephemeralKey: string;
customer: string;
}>(environment.api + 'payment-sheet', {}).pipe(first()).toPromise(Promise);
Stripe.createPaymentFlow({
paymentIntentClientSecret: paymentIntent,
customerEphemeralKeySecret: ephemeralKey,
customerId: customer,
});
})();
You can use options of CreatePaymentFlowOption on
createPaymentFlow.
method createPaymentFlow(...)
createPaymentFlow(options: CreatePaymentFlowOption) => Promise<void>
Props paymentIntentClientSecret or setupIntentClientSecret, and customerId,
customerEphemeralKeySecret are required. And be able to set style alwaysLight or alwaysDark, prepare
Apple Pay and GooglePay on PaymentFlow.
interface CreatePaymentFlowOption
| Prop | Type | Description | Default |
paymentIntentClientSecret | string |
Any documentation call 'paymentIntent' Set paymentIntentClientSecret or setupIntentClientSecret |
|
setupIntentClientSecret | string |
Any documentation call 'paymentIntent' Set paymentIntentClientSecret or setupIntentClientSecret |
|
billingDetailsCollectionConfiguration | BillingDetailsCollectionConfiguration |
Optional billingDetailsCollectionConfiguration | |
customerEphemeralKeySecret |
string | Any documentation call 'ephemeralKey' | |
customerId |
string | Any documentation call 'customer' | |
enableApplePay |
boolean | If you set payment method ApplePay, this set true | false |
applePayMerchantId | string | If set enableApplePay false, Plugin ignore here. |
|
enableGooglePay | boolean |
If you set payment method GooglePay, this set true | false |
GooglePayIsTesting |
boolean | | false, |
countryCode |
string | use ApplePay and GooglePay. If set enableApplePay and enableGooglePay false, Plugin ignore here. |
"US" |
merchantDisplayName | string |
| "App Name" |
returnURL |
string | | "" |
style |
'alwaysLight' | 'alwaysDark' | iOS Only | undefined |
withZipCode | boolean | Platform: Web only Show ZIP code field. |
true |
2. presentPaymentFlow
When you do presentPaymentFlow method, plugin present PaymentFlow and get card information. This method must do after
createPaymentFlow.
(async () => {
const presentResult = await Stripe.presentPaymentFlow();
console.log(result);
})();
You can get
{ cardNumber: string; } from presentPaymentFlow.
method presentPaymentFlow()
presentPaymentFlow() => Promise<{ cardNumber: string; }>
In do PaymentSheet, presentPaymentSheet method get result. But in PaymentFlow,
presentPaymentFlow method is progress.
3. confirmPaymentFlow
(async () => {
const confirmResult = await Stripe.confirmPaymentFlow();
if (result.paymentResult === PaymentFlowEventsEnum.Completed) {
}
})();
PaymentFlowResultInterface is created from Enum of
PaymentFlowEventsEnum. So you should import and check result.
type alias PaymentFlowResultInterface
PaymentFlowEventsEnum.Completed | PaymentFlowEventsEnum.Canceled | PaymentFlowEventsEnum.Failed
4. addListener
Method of PaymentFlow notify any listeners. If you want to get event of payment process is 'Completed', you should add
PaymentFlowEventsEnum.Completed listener to
Stripe object:
Stripe.addListener(PaymentFlowEventsEnum.Completed, () => {
console.log('PaymentFlowEventsEnum.Completed');
});
The event name you can use is
PaymentFlowEventsEnum.
enum PaymentFlowEventsEnum
| Members | Value |
Loaded |
"paymentFlowLoaded" |
FailedToLoad |
"paymentFlowFailedToLoad" |
Opened |
"paymentFlowOpened" |
Created | "paymentFlowCreated" |
Completed | "paymentFlowCompleted" |
Canceled | "paymentFlowCanceled" |
Failed | "paymentFlowFailed" |
📖 Reference
See the Stripe Documentation for more information. This plugin is wrapper, so there information seems useful for you.
Complete the payment in your own UI(iOS)
This plugin use PaymentSheet.FlowController on
pod 'Stripe':
https://stripe.com/docs/payments/accept-a-payment?platform=ios&ui=payment-sheet#ios-flowcontrollerhttps://stripe.com/docs/payments/accept-a-payment?platform=ios&ui=payment-sheet#ios-flowcontroller
Complete the payment in your own UI(Android)
This plugin use PaymentSheet.FlowController on
com.stripe:stripe-android:
https://stripe.com/docs/payments/accept-a-payment?platform=android&ui=payment-sheet#android-flowcontrollerhttps://stripe.com/docs/payments/accept-a-payment?platform=android&ui=payment-sheet#android-flowcontroller
